


Coffee Bar Style Upgrade: 1㎡ Peel & Stick Backsplash Inspiration
|
|
Time to read 7 min
|
|
Time to read 7 min
Home coffee bars are undoubtedly the best way to bring cafe charm into your regular routine. After all, you get to prepare your coffee in a personal, small sanctuary to fuel yourself for the rest of the day.
The best part? You don't even need a full kitchen remodel to create a special vibe. Sometimes, one thoughtful detail can do the trick. And what else would be better than 1㎡ Peel & Stick Backsplash Inspiration? Yes, that's right!
Many people are upgrading their kitchens with this trick, as it gives you a tiny area with an oversized impact in only a few hours. That means you can install an easy-to-clean backdrop that frames your espresso machine beautifully.
Eager to explore more? Grab your cup of coffee, and let's have a look!
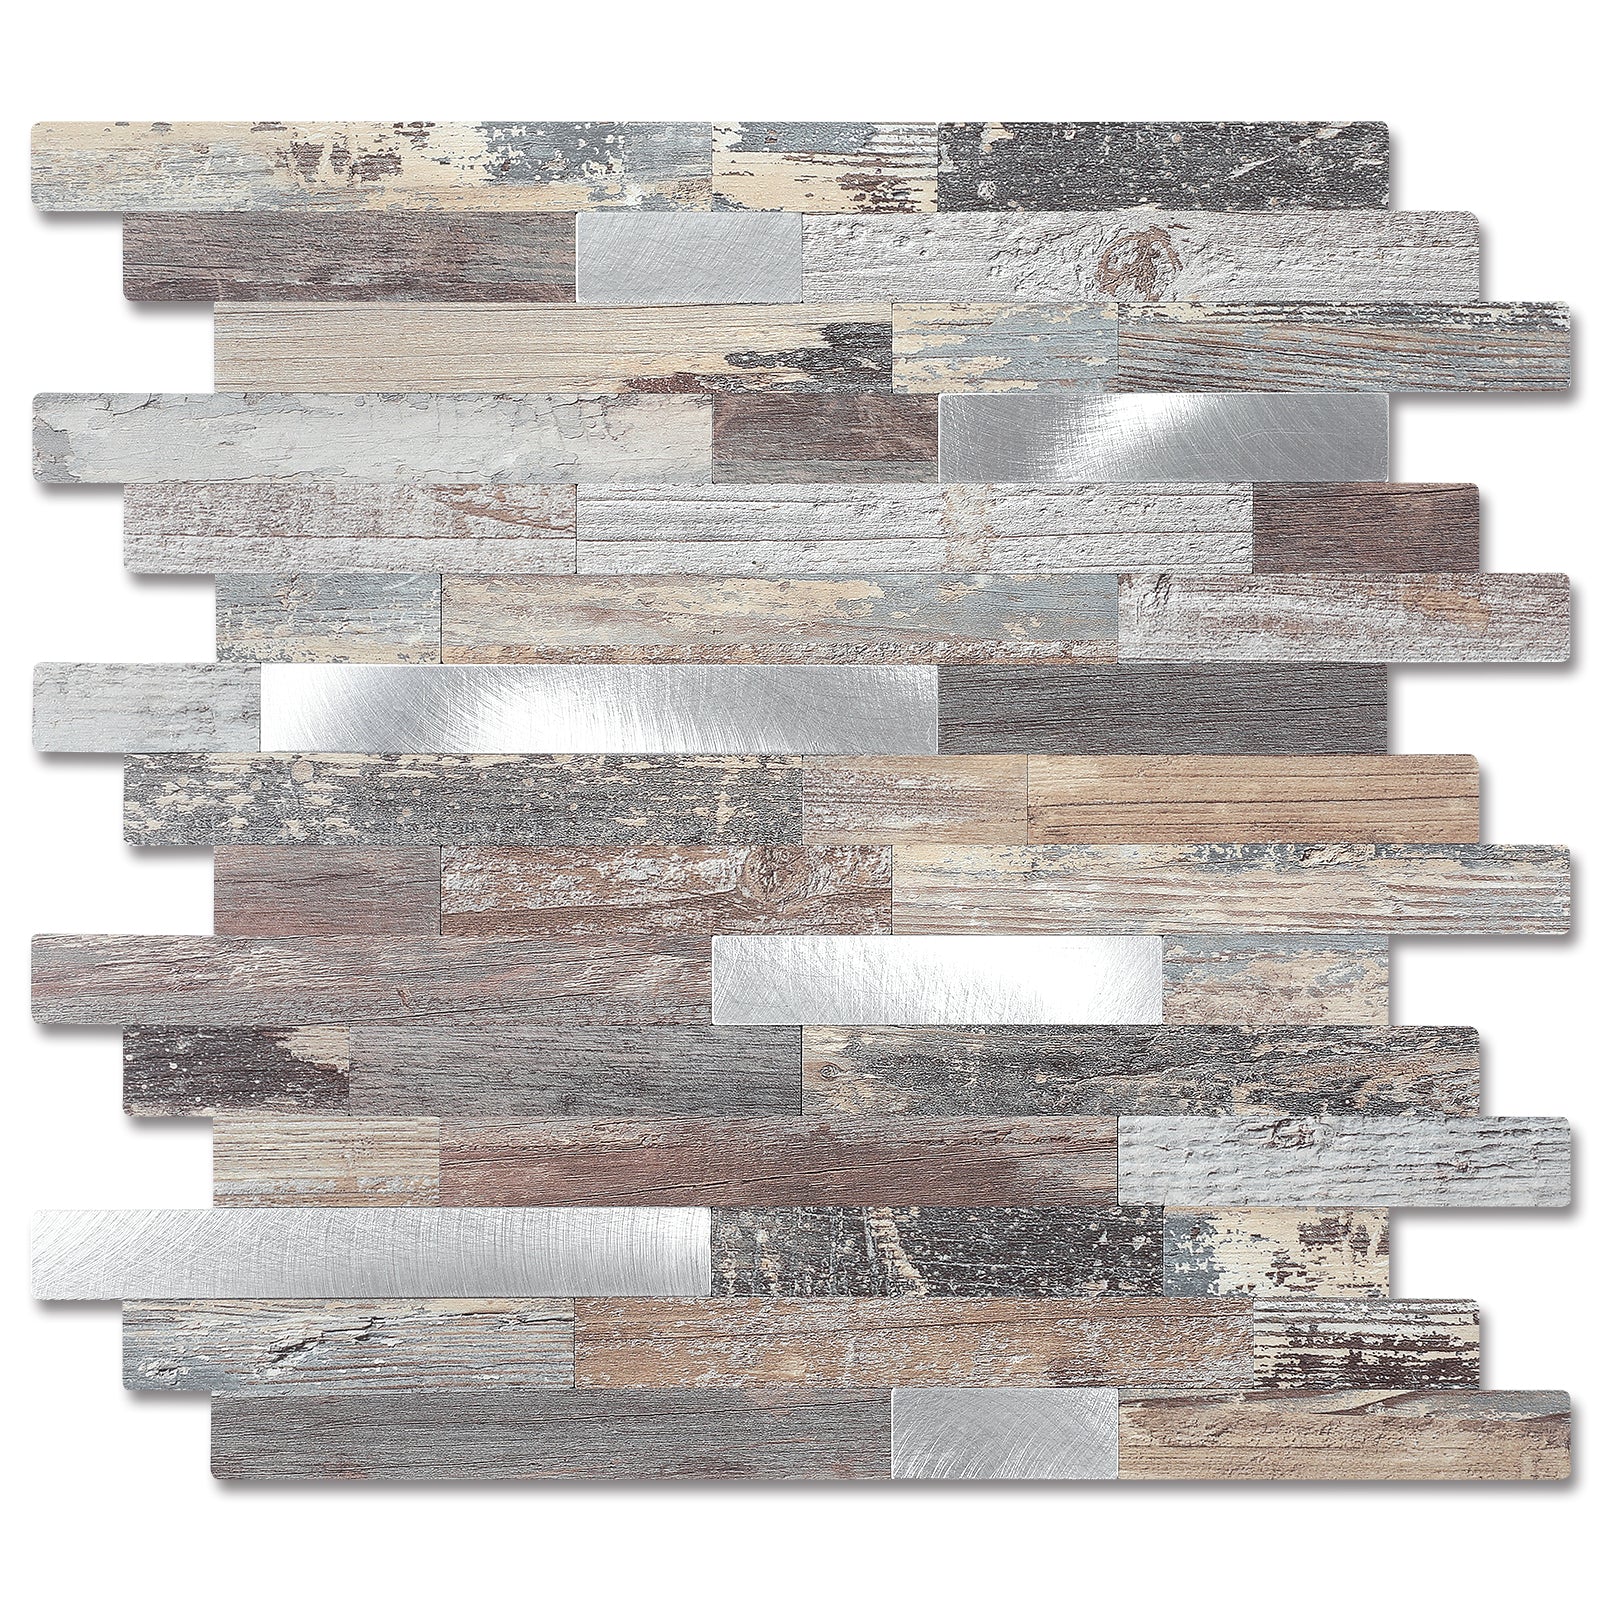
A peel & stick backsplash is ideal for coffee lovers everywhere, as it's quick and easy to install. You don't even need help from a professional or tools. Just peel, stick, and smooth all the panels into place, and you're done.
Here are some more perks you get:
Surface considerations and style categories selection play a vital role in giving your place an upgrade that you'll love and feel comfortable in.
So, here's your quick material section guide:
Style Category |
Best Materials |
Color Palette |
Vibe |
Modern Minimalist |
Glass-look, high-gloss porcelain-effect vinyl |
Monochrome, neutrals |
Sleek & professional |
Rustic Farmhouse |
Subway tile-look, soft-texture panels |
Warm whites, soft grays |
Cozy & inviting |
Industrial Chic |
Metal-effect, concrete-look panels |
Charcoal, bronze, gunmetal |
Urban & edgy |
Bohemian Accent |
Patterned, mosaic-style sheets |
Jewel tones, terracotta |
Creative & eclectic |
Note:- Make sure you choose a material that also balances style with daily life. For instance, you can consider glossy for convenient cleaning, metallic for drama, or textured for warmth.
The best thing about coffee bar spaces is that they don't need huge spaces to stand out. All you need is a stunning concept in your mind to make it look awe-inspiring.
Let's see what appealing options and concepts you can try:
Installation methods can differ depending on the backsplash material. But peel and stick products are surely easiest to install. It involves the following simple steps:
Check the walls and make sure they are clean, dry, and flat. Now, measure the area you wish to cover, and add a few centimeters for trimming. To plan the layout and visualize alignment, use dry-fit sheets on the counter.
Now, it's time to use rubbing alcohol or a gentle cleanser to remove oils. Then, use a level to draw a faint guideline so that the panels sit straight. You should also mark switches and outlets for cutouts. Don't forget to turn off the power before the process.
Start from the bottom center or a corner, as per your layout. For the application, you can use a hinge technique. Peel a small section of backing, align, and smooth the panel down slowly while peeling more backing. Then, smooth from the center outward with a squeegee to remove air bubbles.
Use a sharp knife for crisp edges. Measure twice and cut precisely. Also, cut the panel a bit larger than the opening of the outlet, and trim after mounting for a snug fit. Now, use matching caulk where the panel meets the counter for a professional look.
Lastly, check seams and press down any sort of lifting corners with pressure. Remove adhesive residue instantly with a good solvent or running alcohol. Wait for 24 to 48 hours to settle it and avoid heavy use of heat close to the backsplash during that time.
Even for renters, a peel-and-stick backsplash works great because it is super affordable, and you can remove it anytime without damaging the walls.
See the table below to know about different material options with costs:
Material Type |
1㎡ Cost |
Installation |
Total Investment |
Premium Glass |
$45–65 |
DIY |
$45–65 |
Porcelain Look |
$25–40 |
DIY |
$25–40 |
Ceramic Subway |
$20–35 |
DIY |
$20–35 |
Vinyl Patterns |
$15–25 |
DIY |
$15–25 |
Now that you're familiar with the costs, it's important that you also consider some budget allocation tips:
Tip #1: Make the focal area (the central 1㎡) the main place to invest, and choose a metallic finish or premium pattern.
Tip #2: Try using simple materials on trim pieces or less-visible sections to save areas.
Tip #3: Choose clearance sheets or multipacks. Many sellers offer small-format sheets that are ideal for a 1㎡ project.
1㎡ Peel & Stick Backsplash is designed in a way that makes it low-maintenance. That's also the reason they are best for coffee bars where spills are difficult to avoid. Follow these steps to keep it in its best:
A few thoughtful touches can take your new backsplash to the next level and give your small coffee corner a welcoming look. Here's what to do:
➔ Task Lighting (add under-shelf LED strips for more visibility during brewing sessions)
➔ Accent Glow (use a small spotlight or puck light for highlighting your new backsplash)
➔ Storage Basics (use a slim tray or matching canisters to keep your essentials organized)
➔ Display Touches (add one or two of your mugs or a small grinder for charm and personality)
Non-porous vinyl and treated composite with semi-gloss or glossy finish are ideal options, as they can resist moisture and increase the life of the backsplash.
Well, clean the wall with rubbing alcohol first to remove oils. Then, fill the peeling areas of dents with sand to smooth them and ensure that the paint is completely cured.
Yes, you can. But remember, textured walls can give you a bit of a tough time, so prefer light textures or smooth surfaces, so the backsplash presses firmly.
In a nutshell, a small coffee bar can entirely transform your living space or kitchen. And yes, peel and stick backsplash makes it even easier to create a functional, stylish setup on your own without requiring extraordinary tools or skills.
In this article, we discussed everything you should know about a coffee bar style upgrade with 1㎡ Peel & Stick Backsplash as your next inspiration. Installation steps, material guide, cost breakdown, design inspiration concepts, and all other details are covered.
So, when are you guys starting your coffee bar transformation? Let us know in the comments!


