


How to Install Hexagon Tile Backsplash Like a Pro
|
|
Time to read 7 min
|
|
Time to read 7 min
Do you want to upgrade your space with geometric pattern tiles without a professional? Hexagon peel and stick tiles are the best way to give your place a designer look. It is very easy just like the installation of a stick of wallpaper. Geometric shaped tiles give a modern and fresh look to your kitchen and bathrooms due to their honeycomb-inspired design. A sophisticated tile backsplash enhances the functionality of your space in addition to a good look. Unlike traditional subway or square tiles, the honeycomb pattern draws everyone’s attention.
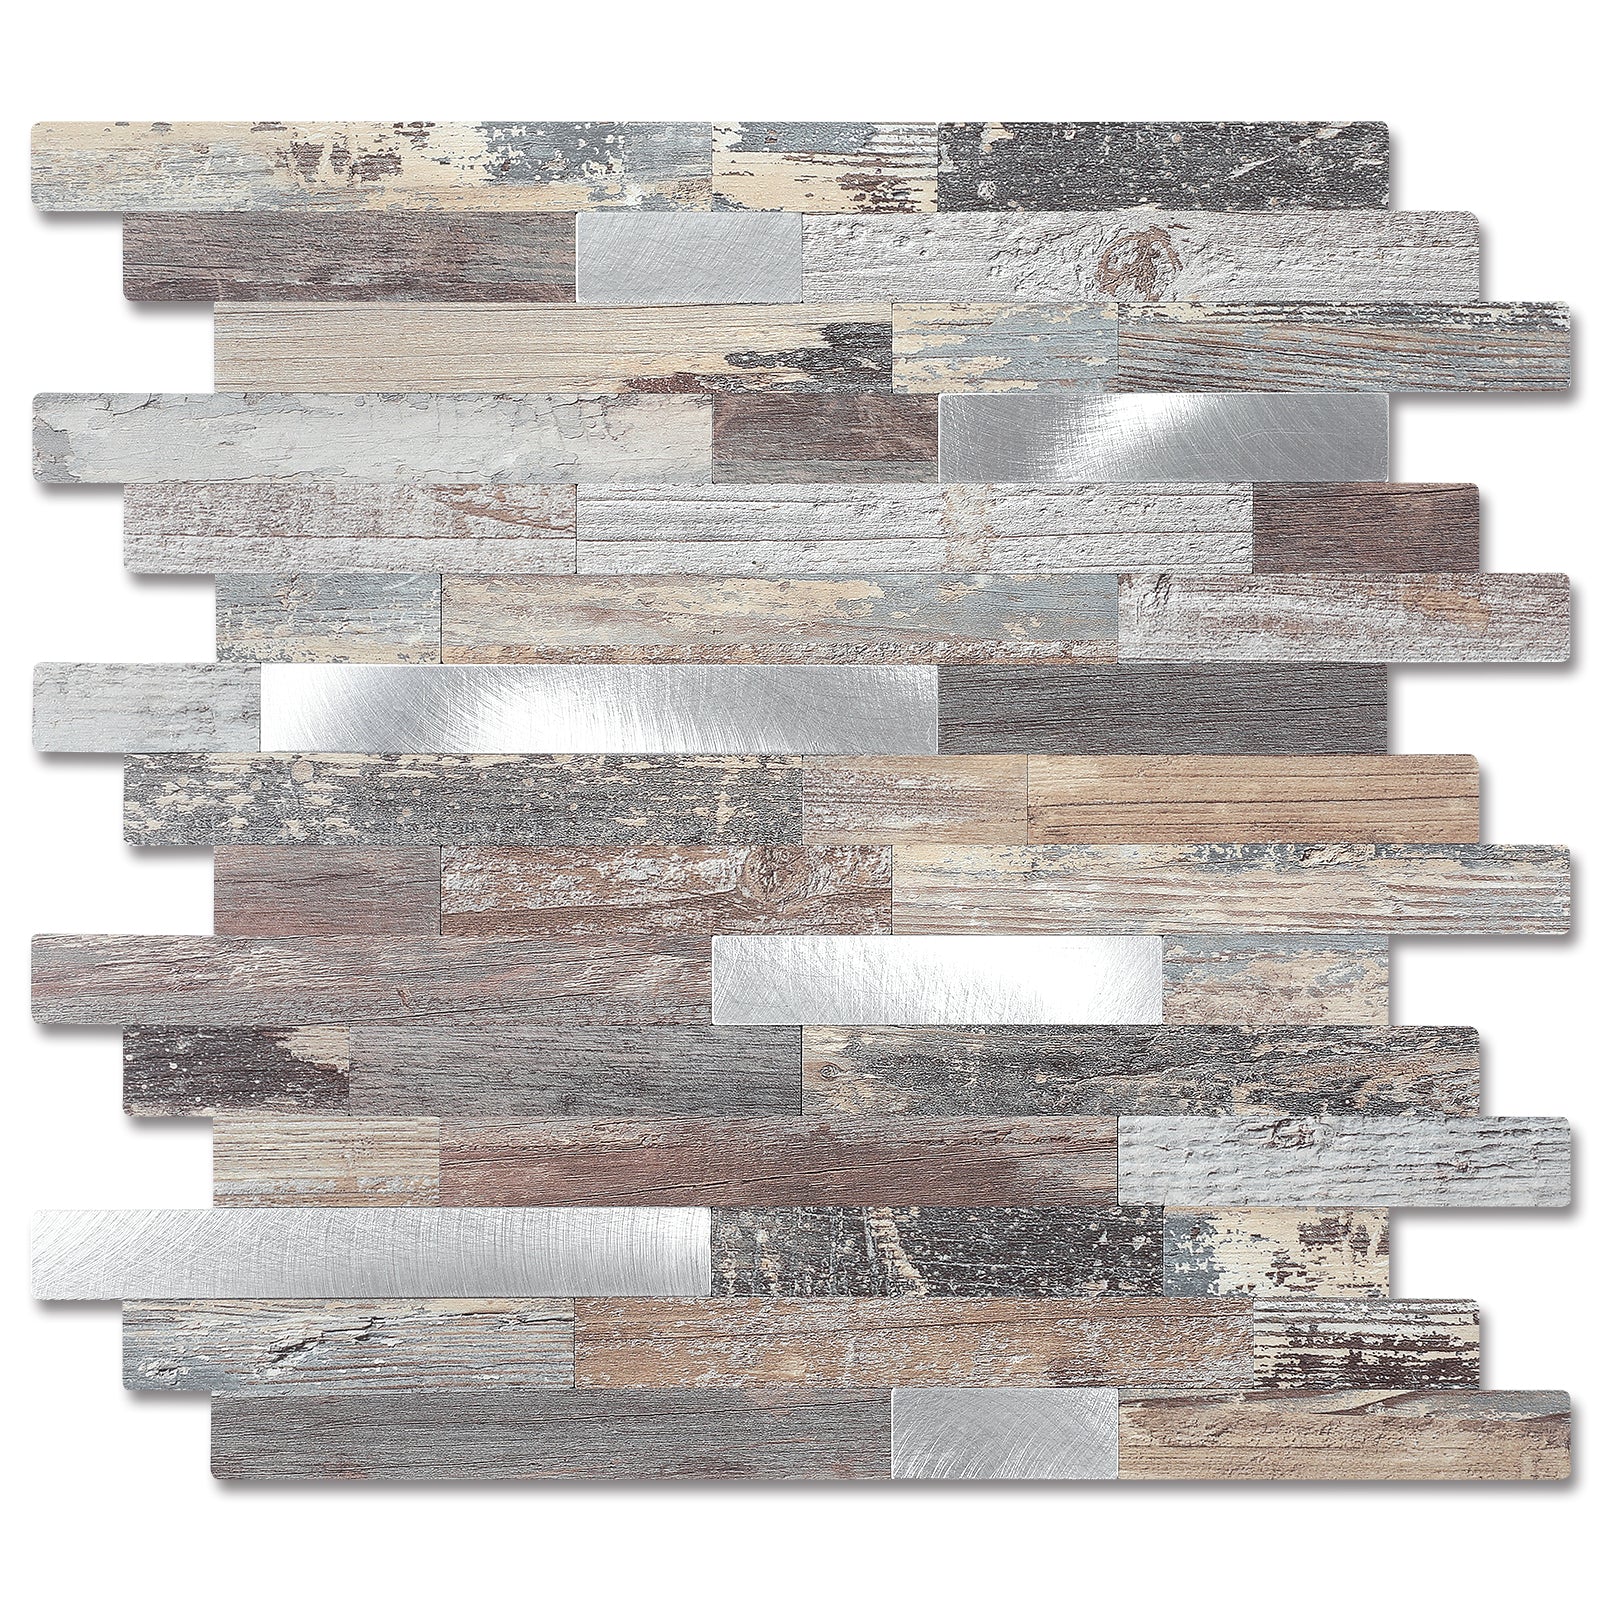
However, with their six equal sides and distinctive angles, they need careful installation to keep their pattern straight and symmetrical across the surface. Every cut of these tiles matters especially around outlets and edges. Your solution lies in peel and stick hexagon tiles from Yipscazo, which feature a modern style and an easy installation process. Stick on tiles eliminate the need for messy mortar and specialized installation tools.
In this article, we will explore a step-by-step guide to the installation of a hexagon tile backsplash like an expert.
Table of Content
The organic approach of peel and stick hexagon tiles is not new; they have been part of interiors for centuries. In ancient times, they were part of Moroccan interiors. In 2026, people are using them in modern styles. The architectural pattern of these tiles is very close to nature, which represents harmony and connection. The interlocking sides of hexagon tiles soothe the mind and guide your eyes across the surface, making the backsplash lively. In 2026, you can find hexagon backsplash tiles in every style, from white tiles to metallic or marble look. In modern-day closed spaces in urban areas, small kitchens or bathrooms need tiles that visually expand the space.
Tile Style |
Description |
Key Features |
Best For |
Charcoal Gray Hexagon with Metal Accents |
Charcoal gray hexagons paired with triangular metal inlays |
Geometric patchwork, eye-catching mixed materials |
Modern, industrial-style kitchens; statement backsplashes |
Copper Hexagon |
Warm copper finish in classic hexagon shape |
Timeless metallic warmth, PVC construction, waterproof and heat resistant |
Farmhouse and vintage-inspired spaces; adds rustic warmth |
White Marble Hexagon |
Elegant white marble-look finish with subtle veining |
Realistic stone appearance, glossy finish, high-strength adhesive |
Luxurious, spa-like bathrooms; classic kitchen backsplashes |
Stone Grain Mixed Metal Hexagon |
Natural stone texture combined with metal accents |
Beige stone grain with metallic inlays, elegant layered design |
Modern chic bathrooms; transitional kitchen designs |
Beige Ecru Stone Metal |
Warm beige stone-look with subtle metal detailing |
4.2mm thickness, super strong backing, waterproof and heat resistant |
Neutral, versatile spaces; laundry rooms, powder rooms |
Blue Metal Mosaic Hexagon |
Blue tones paired with metallic mosaic accents |
Fresh, tranquil color with metallic luxury; sophisticated modern look |
Bathroom vanities; coastal or contemporary themes |
You need some basic tools for the preparation of the surfaces to install the sticks on tiles and their installation. Here are some key tools that you need to install peel and stick hexagon tiles.
Any dust, dirt or grease on a surface where you have to install hexagon tiles can affect their sticking. That's why it is important to clean your surface and prepare it before installation. Let's have a look at some surface preparation steps.
After the preparation of the surface layout mark the tiles on the wall or floor. You can arrange them in your desired pattern, such as in a honeycomb hexagon layout. Use your level and draw lines with the help of a pencil on your surface where you have to align the first row of tiles.
Start the application of hexagon tiles at the intersection of your reference lines. It will ensure a balanced coverage on both sides of the walls.
Peel the back of your peel and stick tiles only from 2 to 3 inches of the back of the tile from the top of the tile. Now align them perfectly with your reference lines and press the top section firmly. After that slowly pull the remaining back peel and apply the tile to the surface.
Use a plastic soother to press the tiles from the center outward. Apply even pressure to ensure full contact and remove all air pockets.
Work outward from your starting point. Frequently check the alignment of your tiles with the level because the hexagon pattern can be disturbed if you do not fully monitor.
Use a sharp utility knife or a heavy-duty pair of scissors to cut between the hexagon tiles. With the help of a contour gauge, capture the shape to cut out. Now transfer the captured pattern to the tile and cut it according to the shape. Now check the fit and peel off and stick.
Apply firm pressure on all the tiles to ensure complete adhesion. Seal the edges of the hexagon tiles with the help of a thin bead of clear silicone caulk along the edges of the backsplash where it meets the side walls and cabinets.
Keep Hexagon tiles untouched for 48 hours to allow them to fully bond with the surface.
After the tiles have adhered strongly, reinstall all the electric outlets that you have removed during the preparation of the surface.
Here are some Tips to ensure a good installation of hexagon tiles.
You can also read this article to know how to handle potential issues after the installation of peel and stick tiles.
Mistake |
Why It's a Problem |
How to Avoid |
Skipping Surface Prep |
Tiles won't adhere; edges lift |
Clean thoroughly with degreaser and rubbing alcohol |
Assuming Counter is Level |
Pattern will slope noticeably |
Always use a level for reference lines |
Poor First Tile Placement |
Entire pattern drifts off-center |
Use hinge method; measure twice before pressing |
Inconsistent Spacing |
Hexagon pattern looks chaotic |
Use consistent spacing; check alignment frequently |
Forcing Cuts |
Jagged edges, broken tiles |
Use sharp blades; cut from back when possible |
Not Sealing Edges |
Moisture seeps behind tiles |
Apply silicone caulk around all edges |
You can cut peel and stick tiles with the help of heavy duty scissors or a sharp utility knife without any damage.
You don't need any extra adhesives for Yipscazo stick on hexagon backsplash tiles. However, you can use a silicone adhesive or double sided tape on the corners and edges for your satisfaction.
Yes you can install hexagon tiles on an existing backsplash. But you have to make the surface smooth and remove all the bumps and textures.
To Ensure a straight hexagon pattern mark outline of tiles with the help of tiles. Also mark the starting point and center of tiles to smoothly install them in a pattern.
Yes, Yipscazo hexagon tiles are heat-resistant enough for heat. Make sure you select the right model to use behind your stove as PVC hexagon tiles are best suited to be used behind the stove.
Always follow the guidelines of the National Kitchen and Bath Association before the selection of materials for your kitchen and bath.
The most rewarding DIY project to install in your kitchen or bathroom backsplash is the installation of Yipscazo hexagon tiles. With the help of proper tools and careful planning you can arrange your backsplash tiles in a beautiful honeycomb architecture design. The geometric pattern of these Tiles may look complex at first but it can give your space a modern and stylish look. Explore Yipscazo hexagon peel and stick today and elevate your space effortlessly without professional help.


